16 November 2011

This tutorial was written by me on 16 November 2011. Any similarity to other tutorials is not intentional.
Supplies:
Tube of Choice. I am using a gorgeous tube by Jamie Kidd. If you want to use the same tube you can purchase it at CDO HERE.
Scrapkit - I used a FTU kit which Kristin made for the Creative Misfits blog. You can download it HERE.
Template - missy_tagtemplate310 which you can download HERE
Don't forget to leave some love when you download!
Filters - psp filter Artistic Effects Halftone, Xero Radiance, Mura Meister Copies
Font of choice, I used Baby Cakes NF.
Let's start!
Open your template, shift D to duplicate it and close the original. Delete the credits and the wordart by Missy layers.
Add your main tube as your top layer so you can see where you're placing things!
Using your target brush, change the colour of the glittered circle layer to something which matches your tube.
On the circle layer. Selections, select all, float, de-float and copy and paste a paper, I used paper 9. Re-size if you want to. Selections, invert, delete, select none. Crop your tag to avoid the dreaded overhang shadow! Delete the original circle layer. I added a gradient glow to the paper layer to make it stand out a bit.
Gradient background layer - selections, select all, float, de-float. New raster layer, and fill with a gradient to match your tube. Select none, delete original gradient background layer.
Close the pump up the volume layer for now, we'll come back to that later.
On the frame 1 layer, add noise random 35% monochrome checked. Do this to all the frame layers and add a slight drop shadow.
Copy and paste ribbon 2 and re-size 75%. Place on the left of your frame, drop shadow.
Copy and paste ribbon 1, re-size, place on the right side, drop shadow.
Frame 2 background - float, defloat, new raster layer. Fill with your gradient. Copy and paste your close up tube, delete and select none. Crop your tag. Duplicate your tube. Go to effects, artistic effects halftone and apply using these settings.

Change the blend mode to soft light. Change the blend mode on the original tube layer to Screen.
Repeat for your frame 3 background layer, mirroring your tube.
Copy and paste the sequins above your background layer. Re-size 75%.
Copy and paste wire, re-size 115%
Copy and paste the splatter, re-size 95%. Duplicate twice and place around the outside of your tag.
Copy and paste the hat above the frame 3 layer. Re-size 60% and drop shadow. Place over the sequins.
Copy and paste flower 2, re-size 55%, sharpen, drop shadow.
Copy and paste the splatter, re-size 95%. Duplicate twice and place around the outside of your tag.
Copy and paste the star, re-size 95%, adjust sharpen, drop shadow. Place on the top right side of your frame. Duplicate, re-size 75%. See my tag for placement.
Copy and paste skull 1. Image mirror, re-size 35%. Place between your two stars. Sharpen and drop shadow.
Copy and paste bow 4, re-size 345%, sharpen, drop shadow and place over your left frame. Duplicate, re-size 80% and place over your right frame.
Copy and paste kitty frame 1, image mirror. Re-size 70%, drop shadow, sharpen and place top left of your frame.
Copy and paste tattoo, re-size 40%, sharpen, drop shadow and place bottom right.
On your main tube layer, effects Xero Radiance, hit the random button until you get something you like. Duplicate tube and on the copy, adjust blur, gaussian blur 3. Set the blend mode to soft light. Drop shadow the original tube layer.
Add some sparkles!!!!
Add your name and re-size your tag. Go back to the pixel word layer you closed earlier. Above the gradient frame layer type out some text using a pixel font. I wrote Emolicious. Object, align, centre in canvas, convert to raster. Apply Mura Meister copies, Tiling, default settings but change the gap size to 2. Float/Defloat the gradient frame layer. On the pixel word layer, selections, invert, delete, select none.
Add your artist's copyright & you're finished!
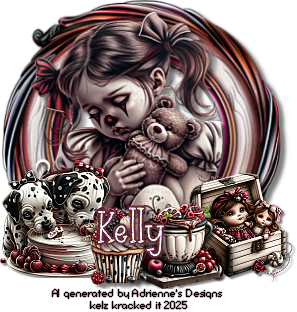
03 July 2011

This tutorial was written by me on 3 July 2011 and updated by me on
3 October 2022. Any similarity to other tutorials is not intentional.
Supplies
Tube and close up of choice. I am using a gorgeous tube by Zlata M. If you would like to use the same tube, you can purchase it at Picsfordesign HERE.
Scrapkit - I used a kit called Neon Punk which the awesome Kristin and Tamie made as a collab. You can download this kit HERE. Thanks so much Kristin and Tamie!
Filters - Xero Radiance
Mask - I used WSL Mask 344, which you download HERE.
Font of choice - Viva la Vida.
Let's start!
Open a new canvas 800 x 800. Floodfill white. Copy and paste frame, re-size 90%. Use your freehand selection tool to select around the frame border. Copy and paste paper 12, selections, invert,delete, select none.
Copy and paste Kristin paper 10, load mask, merge group.
Copy and paste your tube above the frame layer. I re-sized mine by 80%. Effects Xero Radiance. Hit random until you get the effect you like. Duplicate the tube layer, and on the top layer, adjust blur, gaussian blur 3. Change the blend mode to soft light. Drop shadow the bottom tube layer and the frame layer.
Working beneath the tube layer - Copy and paste Star1, re-size 50%. Adjust sharpness, sharpen (do this on the re-sized layers), drop shadow. Place to the top right of the frame.
Copy and paste the Zipped Heart, re-size 70%. Place below the Star. drop shadow (drop shadow all elements).
Copy and paste sunglasses, re-size 55%. Place towards the bottom of your tag, under the tube's shoe, if you're using the same tube I did.
Copy and paste skull cherry, re-size 75%, place on the left of the frame.
Copy and paste sign, re-size 50%. Place on the right side of the frame.
Copy and paste Shoe, image mirror, re-size 60%. Place at the bottom right of the frame.
Now, working above your tube layer, copy and paste the bottle, re-size 55%. Place towards the bottom of your tag.
Copy and paste flower 4,re-size 60%. Place top left corner.
Copy and paste bear, re-size 70% Place top left of your tag.
Copy and paste butterfly 2, re-size 70% Place top left of your tag.
Copy and paste lips 1, image mirror and place on the left side of your tag.
Copy and paste skull 2, re-size 50% and place on the left of your tag.
Crop your tag and re-size. Add some sparkles!
Add your name and your artist's copyright and you're finished!
This is the original sample tag

Subscribe to:
Posts
(Atom)
Snag My Blinkie

Forum I'm At!!

Blogs I Like












Subscribe


 Posts
All Comments
Posts
All Comments