08 September 2012

This tutorial was written by me on 8 September 2012 and updated on
1 October 2022 . Any similarity to other tutorials is not intentional.
Supplies:
Tube of choice. I am using a gorgeous tube by Zebrush from PFD. If you would like to use the same tube, you can purchase it at Picsfordesign PFD
Scrapkit - I used a kit called So Angelic which the awesome Kittz made. This kit is no longer available, but you really only need a ribbon and some stars
Mask - I used Becky's mask 042, which is no longer available. Any mask will be fine.
Font of choice, I used Jayne Print YOFF.
Let's start!
Open a new canvas 800 x 800. Floodfill white.
Copy and paste Corner Bow. Duplicate, Image Mirror, Image flip. Merge down. Use your deform tool to stretch out the width a little.
Use your freehand selection tool to draw along the frame. Copy and paste paper 12 as a new layer. Re-size 80%. Selections, invert, delete, select none.
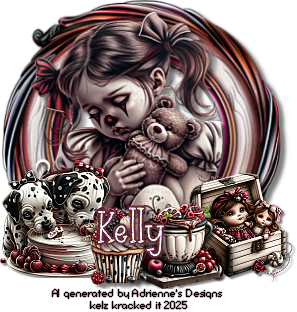
Duplicate your frame. Copy and paste your tube between the two frame layers. On the top frame layer, erase parts of the frame so your tube is half within and
half outside the tube. See my tag if this isn't clear! You'll need to
erase bits of the tube that is outside the frame as well. Crop. Drop shadow the
lower frame layer.
On the tube, effects, xero radiance. Just hit random to get something
you like. Duplicate the tube and on the copy, adjust blur, gaussian
blur 3. Change the blend mode to soft light, and drop shadow on the
original layer.
Copy and paste glass stars above your background layer. Re-size 50%, drop
shadow.
Copy and paste a paper of choice above the background layer and
load mask, merge group.
Crop your tag and re-size. Add some sparkles!
Add your name and your artist's copyright and you're finished!
05 September 2012

This tutorial was written by me on 5 September 2012 and updated on
1 October 2022. Any similarity to other tutorials is not intentional.
Supplies:
Tube of choice - I used a stunning tube by Chris Pastel. You can purchase the tube at his store HERE.
Scrapkit - I used an awesome PTU kit by Toxic Desirez which you can download HERE
Template - I used AR315_Template54. This awesome template is by Aqua, and you can download it HERE.
Filters - Xero Porcelain
Font of choice - Inspiration
Don't forget to leave some love when you download!
Let's start!
Open template, shift D to Duplicate and delete the original. Delete the credits layer, lower and upper glitter strips and lower pink strip. Close the background layer and crop. Image, canvas size 730 x 566 and under placement, click on the bottom left arrow to allow room for the tube to be placed on the right.
Open the background layer again.
Copy and paste your tube as the top layer. Effects xero porcelain, default settings but change the softness to 12. Duplicate the tube, and on the copy, adjust blur, gaussian blur 3. Change the blend mode to soft light. Drop shadow the original layer.
Now everything is off centre! Crop the tag again, and increase the canvas size to 730 x 600, this time clicking the centre diamond to have everything centred. You might know an easier way to do all this, so do that instead!
Increase the mask layer by about 110%. You can colour it if you like!
Upper glitter circle and lower glitter circle layers - add noise and drop shadow.
Upper Black Circle and Lower black circle layers - Selections, select all, float, defloat, new raster layer, fill with a gradient of your choice. Delete original template layer
Centre Black rectangle - Float/defloat, copy and paste paper 11 as a new layer, selections invert delete, select none. Drop shadow. Delete original template layer.
Copy and paste element frame 1, re-size 50%, drop shadow
Centre glitter rectangle - add noise, drop shadow
Centre pink rectangle - Float/defloat, new raster layer, fill with gradient. Select none, delete original template layer
Black rounded rectange 1 - Drop Shadow
Glitter rounded rectangle - add noise, drop shadow.
Black rounded rectangle 2 - Float/defloat, new raster layer, fill with gradient. Select none, delete original template layer
Pixel text layer - Manual colour correction, change text colour to black
Shape layer - Float/defloat, new raster layer, fill with colour to suit your tag. Paste your close up, selections invert delete, select none, delete original template layer. Effects xero porcelain, default settings but change the softness to 12. Duplicate the tube, and on the copy, adjust blur, gaussian blur 3. Change the blend mode to soft light. Drop shadow the original layer, change the blend mode to Luminance L.
Paste element hat, re-size 50% ,drop shadow.
Change the layer link toggle numbers on the poison, pretty and glitter wordart backing layers and move these layer down a bit.
On the Pretty and glitter wordart backing layers, change the colour to suit your tag, drop shadow the glitter wordart backing layer.
Copy and paste element skull re-size 28%
Crop your tag and re-size. Add some sparkles!
Add your name and your artist's copyright and you're finished!
This is the original sample tag

Subscribe to:
Posts
(Atom)
Snag My Blinkie

Forum I'm At!!

Blogs I Like
















Subscribe


 Posts
All Comments
Posts
All Comments