06 October 2012

This tutorial was written by me on 6 October 2012 and updated on 26 September 2022. Any similarity to other tutorials is not intentional.
Supplies:
Tube of choice - I have used a gorgeous Amber tube. If you want to use the same tube you can purchase it and a license to use it at VM Artists HERE
Scrapkit - I used a fantastic kit by Doodle by Design called Deeply Loved, thanks so much hun! You can purchase this kit HERE
Template - I used one by Melissa called MC_Misfit_RectangleTemplate3. This was created for the Creative Misfits blog. You can download it HERE. It's in the post dated 11 March 2012.
Mask - I used the ever popular WSL 84, download it HERE
Font - I used Brush Script MT, which you can download HERE
Don't forget to leave some love when you download!
Let's start!!
Open your template and shift d to duplicate it, close the original. Delete the credits layer (raster 5). Image, re-size, change the resolution to 72 and the size to 100%. Crop your tag and then Image, canvas size 846 x 614.
Create a new raster layer and make it the bottom layer. Fill white.
On raster 1, selections, select all, float/defloat selections modify 3. Create a new raster layer. Copy and paste paper 19 into selection, select none. Delete the original raster 1 layer.
On the bottom merged layer, float/defloat and fill a new raster layer with a colour to suit your tag. Drop shadow. Delete the original template layer.
On the middle merged layer, float/defloat etc and use paper 17.
Float/defloat raster 2, create a new raster layer and fill with a colour or gradient to suit your tag. Copy and paste your tube, selections, invert, delete, select none, Duplicate the tube and mirror then place between the frame. Merge the tubes. Effects, xero, porcelain on default settings but change the softness to 15 and the blue channel to 0. Duplicate the tube and on the top tube adjust blur, gaussian blur 4 and change the blend mode to soft light. Drop shadow the bottom tube and change the blend mode to Luminance legacy.
On the top merged template layer, float/defloat and fill a new raster layer with a colour to suit your tag. Drop shadow and delete the original template layer.
On raster 4 float/defloat, create a new raster layer and fill with a colour or gradient to suit your tag. Copy and paste your tube, selections, invert, delete, select none. Effects, xero, porcelain on default settings but change the softness to 15 and the blue channel to 0. Duplicate the tube and on the top tube adjust blur, gaussian blur 4 and change the blend mode to multiply. Drop shadow the bottom tube and change the blend mode to Soft Light or another blend to suit your tag.
On raster 3 layer, float/defloat and fill a new raster layer with a colour to suit your tag. Drop shadow and delete the original template layer.
Copy and paste element 1, re-size 35% and place at the bottom left of your tag.
Copy and paste element 26, wine glass and re-size 35%, place bottom left of your tag, under the shoe.
Copy and paste element 6, re-size 40% and place at the top left of your tag. Duplicate, image mirror.
Copy and paste element 50, re-size 40% and place at the bottom right of your tag.
Copy and paste element 48, re-size 50% and place under your chocolate box.
Copy and paste your tube, effects xero radiance, just hit random until you see an effect you like. Duplicate the tube, and on the copy, adjust blur, gaussian blur 4. Change the blend mode to soft light. Drop shadow the original layer.
Create a new raster layer above your bottom layer and fill with a paper, colour or gradient. Apply your mask and merge group.
Add some sparkles.
Add your name, crop and re-size your tag, and add your artist's copyright & you're finished!
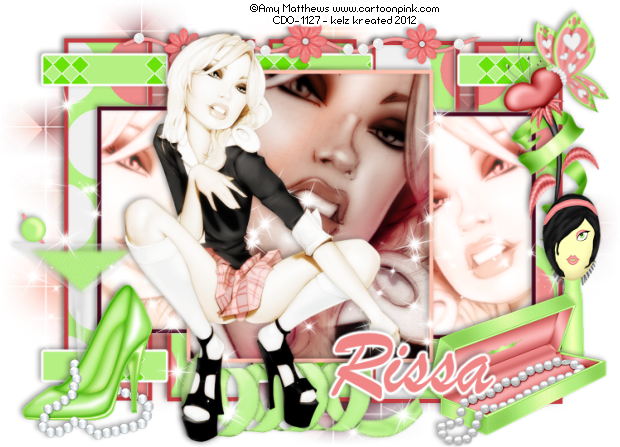
This was the original sample tag

01 October 2012

This tutorial was written by me on 30 September 2012 and updated on 27 September 2022. Any similarity to other tutorials is not intentional.
Supplies:
Tube - I have used a witchy tube by Molly Harrison. If you want to use the same tube you can purchase it and a license to use it at CDO HERE
Scrapkit - I used an awesome kit by Crystals Creations called Jeepers Creepers , thanks so much Crystal! You can download this kit HERE
Template - I used template 45 by Tamie, you can download it HERE
Mask - I used WSL 105, download it HERE
Filters - Xero Radiance and Porcelain, Eye Candy 4000 gradient glow
Font of choice, I used Smiley Monster
Don't forget to leave some love when you download!
Let's start!!
Change the resolution of the template to 72 dpi. Increase the canvas size to 800 x 800. Delete the credits layer.
On the Big Circle layer, selections, select all, float/defloat. Create a new raster layer. Copy and paste paper 4 into selection, select none. Delete the original template layer.
Merge the 2 strip layers together then float/defloat. Copy and paste paper 5 as a new layer, select none and delete the original template layer.
Using the same steps as above, repeat using paper 9 on the rectangle layer.
Paper 11 on rectangle 2 and 3.
Paper 6 on the small circle.
Paper 10 on rectangle 4.
Paper 16 on circle,
You can add a gradient glow to each layer if you want, and drop shadow.
Drop shadow each element as you go.
Copy and paste element 18 as a new layer. See my tag for placement.
Copy and paste element 4, re-size 60%
Copy and paste your tube, effects xero radiance, just hit random until you see an effect you like. Duplicate the tube, and on the copy, adjust blur, gaussian blur 4. Change the blend mode to soft light. Drop shadow the original layer.
Copy and paste element 10, re-size 50%
Copy and paste element 13.
Copy and paste element 31 re-size 50%.
Copy and paste element 34 re-size 60% .
Copy and paste element 7 re-size 50%.
Copy and paste element 33 re-size 30%.
Create a new raster layer above the background layer. Selections, select all and fill with a colour from your tube. Select none. Load your mask, merge group. Re-size 110% and lower the opacity to about 60 if necessary.
Add some sparkles!!
Add your name, crop and re-size your tag, and add your artist's copyright & you're finished!
This is the original sample tag.


30 September 2012

This tutorial was written by me on 30 September 2012 and updated on
28 September 2022. Any similarity to other tutorials is not intentional.
Supplies:
Tube of choice - I have used a gorgeous tube by Alex Prihodko. If you want to use the same tube you can purchase it and a license to use it at VM Artists HERE.
Scrapkit - I used a lovely kit by Scraps Dimensions called Autumn Feel. You can download this kit HERE
Mask - I used an RD mask, use one of your choice.
Filters - Xero Radiance, Eye Candy 4000 gradient glow
Font of choice, I used Autumn Chant
Don't forget to leave some love when you download!
Let's start!
Open a new canvas 800 x 800, floodfill white.
Create a new layer above the background layer. Selections, select all. Copy and paste paper 4 into selection, select none. Load your mask and merge group.
Drop shadow each element as you go, see my tag for placement.
Copy and paste elelment 31, the frame and re-size 85%. Using your magic wand, click inside the frame. Selections modify expand by 5. Copy and paste paper 2 as a new layer, selections, invert, delet. Copy and paste your close up tube as a new layer, delete and select none.
On your tube, effects xero radiance, just hit random until you see an effect you like. Duplicate the tube, and on the copy, adjust blur, gaussian blur 4. Change the blend mode to soft light. Drop shadow the original layer.
Copy and paste element 19, the wheelbarrow, and re-size 50%. Position this on the bottom right of your tag.
Copy and paste the flower elements 27 and 28. Re-size 20%
Copy and paste the shrub element 36, re-size 40%.
Copy and paste element 29, the ribbon and re-size 60%.
Copy and paste the butterfly element 32, re-size 20%.
Add some sparkles!
Add your name, crop and re-size your tag, and add your artist's copyright & you're finished!
This is the original sample tag.

Subscribe to:
Comments
(Atom)
Snag My Blinkie

Forum I'm At!!

Blogs I Like


