30 September 2022
This tutorial was written by me on 29 September 2012 and updated on
28 September 2022. Any similarity to other tutorials is not intentional.
Supplies:
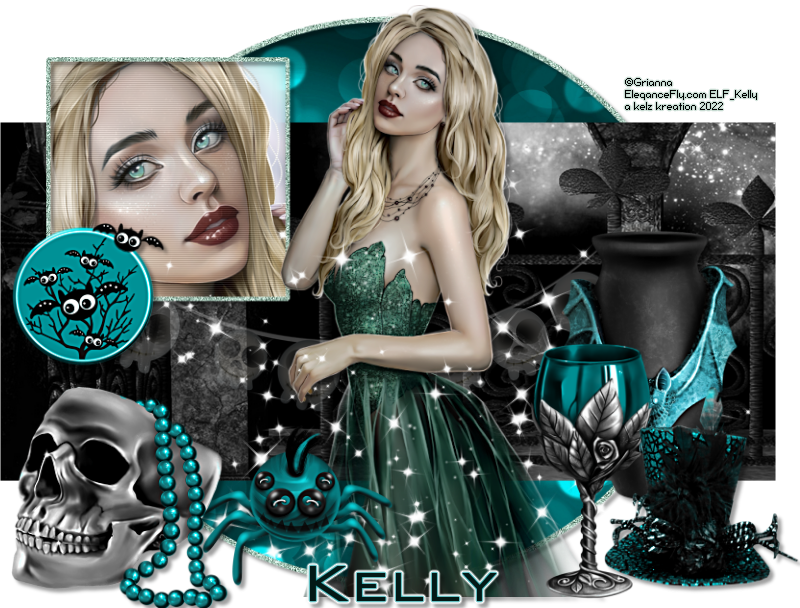
Tube of choice - I have used a gorgeous tube by Grianna which you can purchase at Elegance Fly HERE.
Scrapkit - I used a stunning kit by Wicked Diabla Designs called Selena, thanks Izzy! You can purchase this kit HERE.
Template - I used Template 192 by Punkys Productions, you can download it HERE
Filters - Xero Porcelain, Eye Candy 4000 gradient glow,
Font of choice, I used Bank Gothic
Don't forget to leave some love when you download!
Let's start!
Open your template, shift D to duplicate it and delete the original template. Delete the credits, wordart and hearts layers, bottom square and bottom frame layers. Crop your tag and increase canvas size to 858 x 644. Floodfill the bg layer white.
On the Circle layer, selections select all, float, defloat (float/defloat) copy and paste paper 1 into selection on a new layer. Delete original template layer.
On the circle frame layer, float/defloat and fill with a colour from your tube. Select none. Add some noise if you like. Delete the original template layer. Drop shadow.
On the Black rectangle layer, float/defloat. Copy and paste paper 6 as a new layer, selections invert delete. Delete the original template layer.
On the top square layer, float/defloat, new raster layer, fill with a gradient of your choice. Adjust blur, gausian blur 6. Copy and paste your close up tube, selections invert delete. Delete the original template layer. Effects Penta VTR 2 on default settings.
On the top square frame layer, float/defloat, new raster layer, and fill with the same colour you used earlier. Again, add noise if you want to. Drop shadow.
Merge these 2 layers together.
Drop shadow each element as you go. See my tag for placement.
Copy and paste element 21, re-size 40%
Copy and paste element 98, re-size 40%
Copy and paste element 85, re-size 30%
Copy and paste element 79, re-size 25%
Copy and paste element 72, re-size 30%
Copy and paste element 20, re-size 35%
Copy and paste element 90, lower the opacity to about 26 and lower the layer down until you find a good place for it.
Add some sparkles!
Add your name, crop and re-size your tag, and add your artist's copyright & you're finished!
This is the original sample tag.

Subscribe to:
Post Comments
(Atom)
Snag My Blinkie

Forum I'm At!!

Blogs I Like


0 comments:
Post a Comment