21 August 2010
On a Tangent
8:32 PM
| Posted by
Kelly
Supplies:
Tube of choice. I used the awesome art of my favourite artist, Ismael Rac. If you want to use the same art you must purchase a license HERE.
Filters : Mura Meister Copies, Unplugged effects, Xero Radiance, Eye Candy 4000
Scrap: Star element of choice or draw your own
Font : I used 2Peas Bleached Blonde
Brush of choice. I used Fairy Dust brushes from Dark Yarrow, you can get them here if you want.
Let's start!
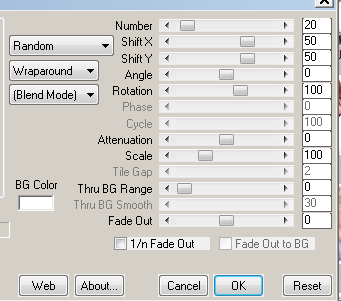
Open a new canvas 600 x 250. Copy and paste your tube as a new layer. Effects, Mura Meister copies Wallpaper Rotate with these settings:
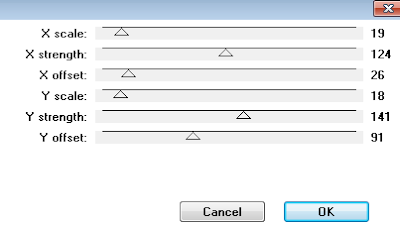
Effects, Unplugged Effects, Tangent Deform with these settings:
Duplicate this layer, Adjust Blur, Gaussian Blur 4. Change the blend mode to soft light. Duplicate twice. The only time I ever name my layers is if I am animating, and I just rename them 1, 2 and 3. This is really only so I can easily see them in my layers!
On my layer 1 - Effects, Distortion Wave with these settings:

Layer 2 - Distortion Wave same settings but change the Wavelength to 25.
Layer 3 - Distortion Wave same settings but change the Wavelength to 15.
Close 2 and 3 for now.
On the original layer (the one you applied the Tangent filter to!), change the blend mode to luminance legacy and lower the opacity to 28.
Make sure you're on the top layer, copy and paste your stars and place off to one side. Drop Shadow.
New raster layer. Apply your brush, I used FF07.
Copy and paste your tube, duplicate, image mirror and place on the left.
On the duplicated tube, lower the opacity to 60-70 and apply a slight drop shadow.
Duplicate your original tube. Adjust blur, gaussian blur 4, change the blend mode to soft light. On the original, Effects Xero Radiance. Drop Shadow.
Make sure you're on your top layer, and open a new raster layer. Floodfill with a colour to suit your tube. Selections, select all, selections modify contract by 4, delete, select none. Adjust, add remove noise, uniform, 75% monochrome ticked.
Copy merged, we'll make the Avatar now. Open a new canvas 150 x 150
. Paste the merged image, re-size 80%, image mirror. Place where it looks best & crop your tag. Do the same border. Add your name or initial and your artist's copyright.
Back to your main tag.
Add your name and artist's copyright.
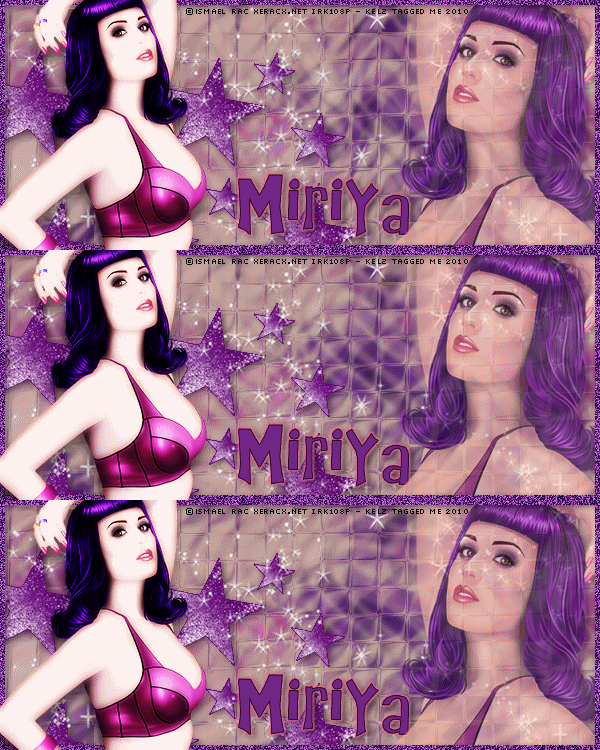
Make sure you have 2 of your Distortion Wave layers closed, and you're on your Layer 1. Copy Merged & paste as new animation in animation shop. Close layer 1 and open layer 2, Copy Merged & paste after current frame in animation shop. Close layer 2 and open layer 3, Copy Merged & paste after current frame.
Edit, select all, change frame properties to 60. If you're happy with it, you're finished!! Thank you for trying my tut!!
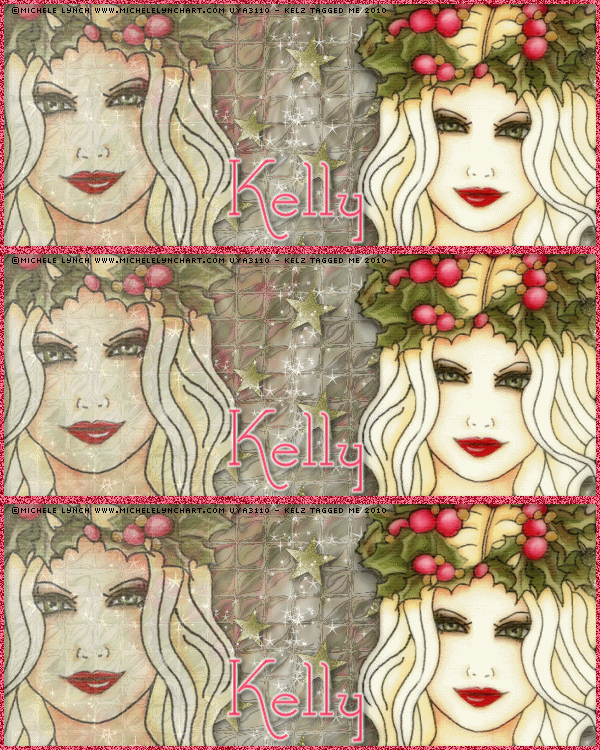
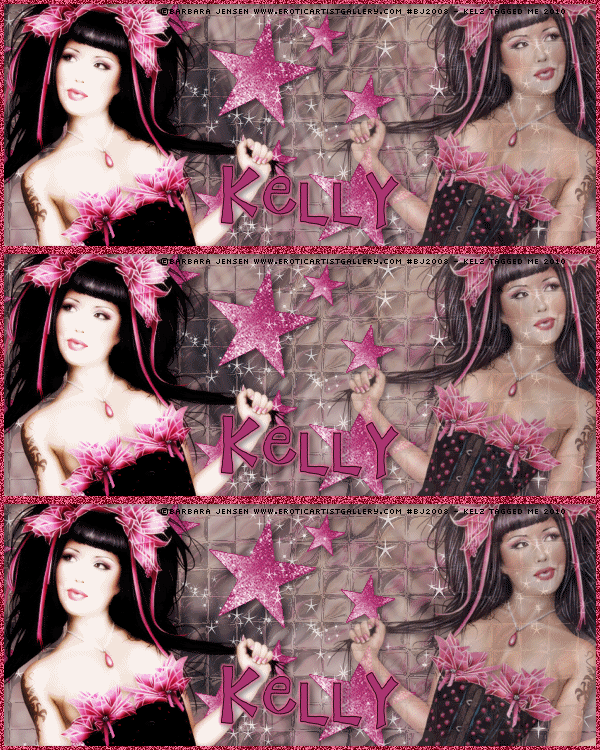
Here are two more examples I made using this tut.
Labels:Tutorials Forum Set
Subscribe to:
Post Comments
(Atom)
CHAT
Forum I'm At!!

Search This Blog
Categories
Archives
-
►
2025
(55)
- ► 16 Nov - 23 Nov (1)
- ► 26 Oct - 2 Nov (1)
- ► 12 Oct - 19 Oct (1)
- ► 5 Oct - 12 Oct (3)
- ► 28 Sep - 5 Oct (1)
- ► 21 Sep - 28 Sep (1)
- ► 14 Sep - 21 Sep (1)
- ► 7 Sep - 14 Sep (2)
- ► 31 Aug - 7 Sep (3)
- ► 10 Aug - 17 Aug (1)
- ► 3 Aug - 10 Aug (2)
- ► 27 Jul - 3 Aug (1)
- ► 20 Jul - 27 Jul (2)
- ► 13 Jul - 20 Jul (1)
- ► 6 Jul - 13 Jul (1)
- ► 29 Jun - 6 Jul (2)
- ► 22 Jun - 29 Jun (3)
- ► 15 Jun - 22 Jun (2)
- ► 1 Jun - 8 Jun (3)
- ► 25 May - 1 Jun (1)
- ► 18 May - 25 May (2)
- ► 11 May - 18 May (1)
- ► 4 May - 11 May (1)
- ► 27 Apr - 4 May (1)
- ► 20 Apr - 27 Apr (4)
- ► 13 Apr - 20 Apr (3)
- ► 6 Apr - 13 Apr (6)
- ► 30 Mar - 6 Apr (3)
- ► 16 Mar - 23 Mar (1)
-
►
2024
(1)
- ► 28 Apr - 5 May (1)
-
►
2022
(40)
- ► 4 Dec - 11 Dec (1)
- ► 20 Nov - 27 Nov (2)
- ► 13 Nov - 20 Nov (3)
- ► 6 Nov - 13 Nov (5)
- ► 30 Oct - 6 Nov (5)
- ► 23 Oct - 30 Oct (2)
- ► 16 Oct - 23 Oct (2)
- ► 9 Oct - 16 Oct (10)
- ► 2 Oct - 9 Oct (5)
- ► 25 Sep - 2 Oct (4)
- ► 18 Sep - 25 Sep (1)
-
►
2013
(4)
- ► 2 Jun - 9 Jun (2)
- ► 19 May - 26 May (2)
-
►
2012
(38)
- ► 18 Nov - 25 Nov (2)
- ► 30 Sep - 7 Oct (4)
- ► 23 Sep - 30 Sep (12)
- ► 16 Sep - 23 Sep (8)
- ► 9 Sep - 16 Sep (1)
- ► 2 Sep - 9 Sep (3)
- ► 19 Aug - 26 Aug (1)
- ► 15 Jul - 22 Jul (1)
- ► 3 Jun - 10 Jun (1)
- ► 22 Apr - 29 Apr (2)
- ► 29 Jan - 5 Feb (1)
- ► 22 Jan - 29 Jan (2)
-
►
2011
(9)
- ► 13 Nov - 20 Nov (1)
- ► 3 Jul - 10 Jul (1)
- ► 26 Jun - 3 Jul (1)
- ► 19 Jun - 26 Jun (1)
- ► 12 Jun - 19 Jun (3)
- ► 29 May - 5 Jun (2)
-
▼
2010
(21)
- ► 26 Dec - 2 Jan (3)
- ► 12 Dec - 19 Dec (1)
- ► 28 Nov - 5 Dec (1)
- ► 14 Nov - 21 Nov (2)
- ► 10 Oct - 17 Oct (1)
- ► 12 Sep - 19 Sep (1)
- ► 22 Aug - 29 Aug (1)
- ► 1 Aug - 8 Aug (2)
- ► 27 Jun - 4 Jul (6)
-
►
2009
(1)
- ► 9 Aug - 16 Aug (1)
Contributors
- Kelly
- Hello and welcome to my blog! I have been in the psp world for over 20 years. I've recently started making AI kits and I'm loving it. I hope you'll find something you like here.



0 comments:
Post a Comment